26 KiB
quick start guide
Furnace is amazingly versatile, but it can also be intimidating, even for those already familiar with trackers. this quick start guide will get you on the road to making the chiptunes of your dreams! if you're a beginner, it will probably take about an hour from start to finish.
this guide makes a few assumptions:
- you've already installed Furnace and know where to find the demo files that come with it. look for
quickstart.furbut don't open it yet. - you haven't changed any configuration or layout yet. it should start up with the default Sega Genesis system.
- you're working with a PC keyboard, US English, QWERTY layout. Mac users should already know the equivalents to the
CtrlandAltkeys. - you're comfortable with keyboard shortcuts. if not, a lot of this can also be done using buttons or menus, but please try the keyboard first. it's worth it to smooth out the tracking workflow.
if an unfamiliar term comes up or you need more clarification on a term, refer to the basic concepts and glossary docs.
if you're not already familiar with the ImGui style of interface, you might want to take a quick glance at the UI components documentation. if at any point something goes wrong with the interface – something gets moved to where it's inaccessible, something closes a window or tab unexpectedly, or the like – it can always be reverted to its original state by selecting "reset layout" from the "settings" menu.
with all that said, start up the program and let's get going!
I've opened Furnace – now what?
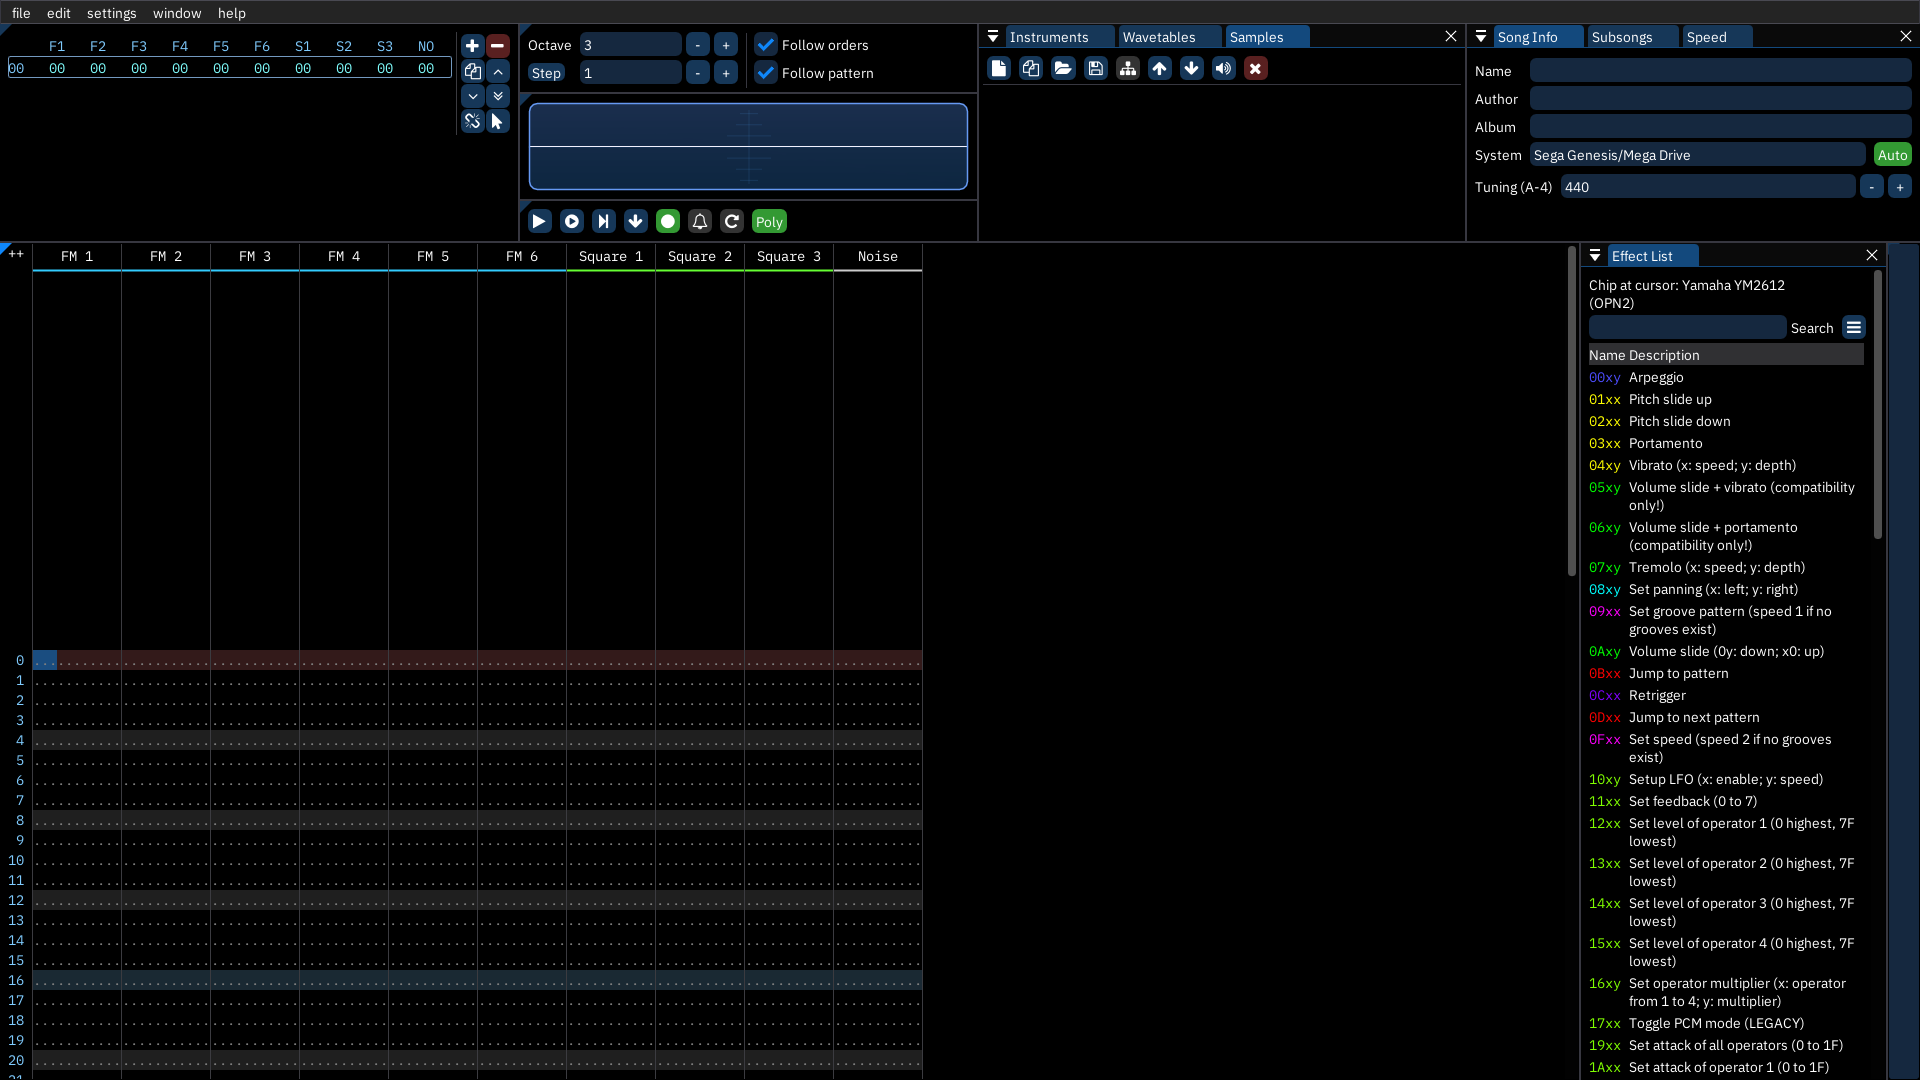
on starting Furnace for the first time, the interface should look like this. if it's not quite right, drag the borders between sections until it approximately matches.
there's a lot going on, but the most prominent part of Furnace's interface is the pattern view – the spreadsheet-like table that takes up the bottom-left.
click to place the cursor somewhere in this view. it will appear as a medium-blue highlight. try moving around with the up and down arrow keys. also try the PgUp and PgDn keys to move around faster. the Home and End keys quickly move to the first and last rows. the vertical axis represents time. during editing and playback the view scrolls around a highlighted row that stays put in the center; this is called the playhead.
now try the left and right arrow keys to move between columns. pressing Home or End twice will shuttle you to the first or last column, respectively. when you're done, hit Home twice to return to the top-left.
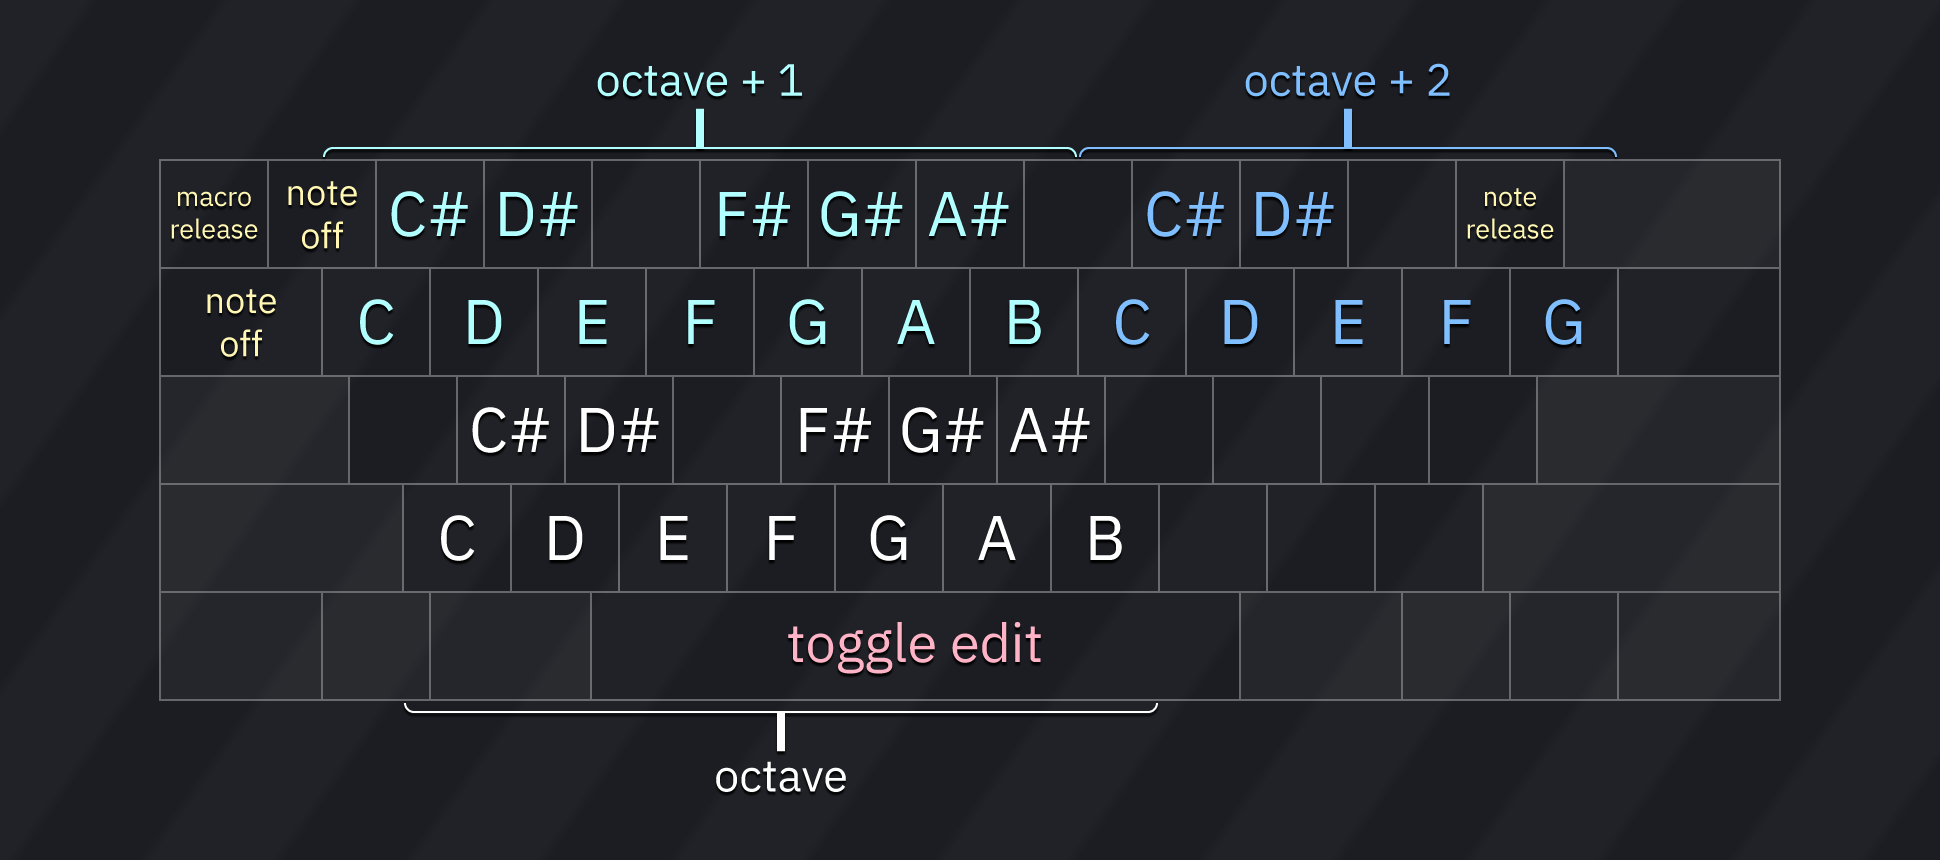
let's play a little! notes are arranged on the keyboard rather like a piano. start with the bottom row of letters (ZXCVBNM). they should sound out the notes of the C major scale, like the piano's white keys. above that, we have the accidentals where the piano's black keys would be expected (SD GHJ). play with these, then move two rows up to find the same arrangement but one octave higher (white keys on QWERTYU, black keys on 23 567). these rows also extend a little further to the right into the next octave.
to change which octaves are represented on the keyboard, use the / and * keys on the numeric pad. (if you don't have a numeric pad, these keys can be remapped; the keyboard doc explains how.) as an alternative, there's an octave selector at the top of the interface, a third of the way in from the left.
now press the space bar to change from play to edit mode. the row the cursor is on will change to dark red – the playhead mentioned earlier. another way to tell what mode we're in is via the play/edit controls just above the pattern view in the center; make sure the "record" button is on.
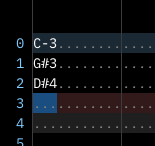
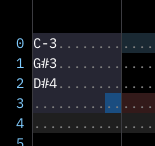
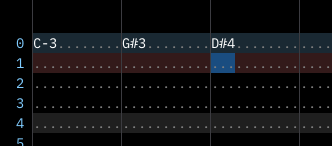
now try playing some notes; they should appear in the pattern view, one after another.
each channel is a group of columns separated from the others by lines, with a name at the top. each channel can only ever play one note at a time. to hear this in action, move the cursor back to the top and press the Enter or Return key to start playback. you should hear the notes you entered played back quickly, one after another, each cutting off the previous note. if you let it play long enough, it'll wrap around to the start to go through them again; press Enter again to stop playback.
now let's clear out those notes. you could delete them individually with the Del key, but let's try something else first. click and drag to select them all. you'll know they're selected when they have a medium grey background. hit Del to delete them all at once.
you'll usually want more than one note playing at a time. move back to the start of the pattern in the leftmost column of the leftmost channel; this should clear the selection area. put some different notes next to each other in the same row. only enter notes in the first column of each channel; we'll get to those other columns later. (don't do more than six notes at once yet. we want to stay in the channels labelled "FM" for now.) once those are in place, go back to the top row and use the Enter key to start playback. they should all sound at the same time as one single chord.
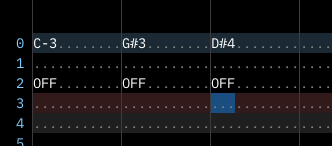
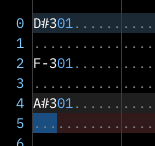
that chord will ring out for quite some time, but let's try stopping it early. a couple rows after that chord, use the Tab or 1 key to enter a note off (sometimes called "note cut") in each channel that has a note. it'll appear as OFF in the note column. now try the shortcut F5 to play from the start without having to move there. you should hear the chord as before, then it will stop where the note offs are, as though letting off the keys of a piano.
of course, errors can happen. let's pretend those note offs were a bad idea and undo them with Ctrl-Z. Furnace keeps track of multiple levels of undo. undo will work for the pattern view, most text entry boxes, and a few other places; try it out here and there along the way to get a sense for what it can undo for you! for now, let's change our minds again and put those note offs back with redo, which is Ctrl-Y.
before the next part of this guide, save the current module – the tracker file that contains everything needed for a song. use Ctrl-S and pick a good spot on your computer for the file. Furnace modules always have a filename that ends in a .fur extension.
how do I get different sounds?
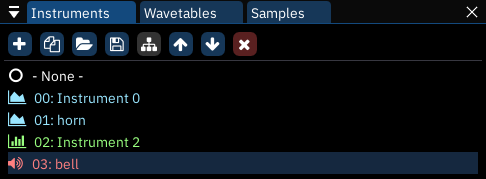
at the top of the interface, just right of center, is the instrument list. there are also tabs for wavetables and samples, but we'll get to those later. just like physical instruments, these define the sounds we can use in the track. unlike physical instruments, these sounds can be endlessly redefined.
click the + button to add a new instrument. a list of instrument types will pop up, one for each type supported by the chips in use. select "FM (OPN)", and the new instrument will appear in the list as "00: Instrument 0". this will sound the same as the default instrument (listed as "- None -").
we still need something new and different, so let's pull from another module. open up a second instance of Furnace and use Ctrl-O to open the quickstart.fur file included with Furnace in its demos directory. the instrument list will contain "00: horn"; select it, then use the floppy-disk save icon above it to save it wherever you like. Furnace instrument filenames end with the .fui extension.
let's return to the first instance with our slowly-evolving practice track. load up the new instrument; click the folder button left of the "save instrument" button and select the file. it will appear in the list as "01: horn", and it should already be highlighted.
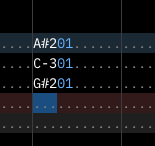
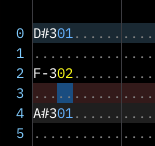
click into the pattern view and add some notes in another FM channel well after our existing chord. we'll hear them with our new sound, and the number 01 appears next to them. this is the instrument column, and it can be edited directly by typing in the number desired. generally, each note should have an associated instrument value.
how do I change volume?
next to the instrument column is the volume column. typing in it will change the loudness of the associated note... but it's not always as straightforward as it seems.
for one thing, this column operates in hexadecimal. in fact, so does the instrument column, and so will the others when we get to them. if you're ever uncertain what the decimal equivalent is, put your cursor over the volume in question and look to the menu bar, which doubles as a status bar. after the menus, it will show "Set volume:", then the decimal value, hexadecimal value, and percentage of full volume.
also, if you haven't saved your recent edits, there will be an indicator at the end which shows the "modified status". it might be worth saving now.
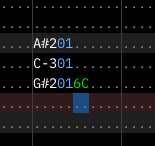
try typing 6C into the volume column of the last note, then play it back. it should be much quieter than those before it in the column because they default to full volume – in this case, 7F. everything in the column after our 6C will inherit that volume level until it's changed again, so you don't have to enter volumes for every single note.
now try putting 90 in the volume column. it automatically changes to 7F because that's the maximum volume available for this channel. different channels may have different maximum volumes because of how each chip works.
it gets a little stranger yet. some chips use "linear" volume, which translates directly to amplitude; dividing the value in half results in half the volume. other chips, such as the one we're using right now, use "logarithmic" volume; subtracting from it lowers the volume based on how loud it sounds. in this particular case, subtracting 8 to get 77 lowers the volume by half; subtracting 8 again to get 6F lowers it to one-quarter. this takes some getting used to, but it's more convenient in some ways.
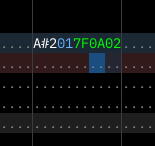
there are more ways to change volume using effects. clear out all of our notes and place one at the top of one of the FM channels, and set it to full volume (7F). next to the volume column are the effect columns. the first of them is the effect type column, and it stores... the type of effect. in that column, type 0A; this corresponds to the "volume slide" effect. next to that, in the effect value column, type 02. hit the F5 key to play from the start, and you'll hear the note play, but instead of staying at a steady volume it'll smoothly fade out.
0A is an interesting effect because its two-digit value is split. look to the "effect list" to the right of the pattern view and find 0Axy. the description includes "(0y: down; x0: up)". this means that while value 01 is a slow fade out and 0F is the fastest, a value of 10 is a slow fade in and F0 is the fastest. try it now; go to row 10 in the same channel and type an effect of 0A20, then play again. the note will fade out until it hits that new effect, then fade back in to full volume! also note that putting the cursor on an effect will show the effect type and description in the status bar.
it's important to know that most effects are continuous, meaning they will continue to do what they do until explicitly stopped. volume slides are like this. place an effect type of 0A on row 16. you can leave the effect value blank or type 00 there; these are equivalent, and both will stop the effect. play from the start, and when the note fades back in, it'll stop short of full volume and remain there.
common effects are explained more thoroughly in the effects documentation. each chip may have its own specialized effects, which are covered in the systems docs. however, those are best explored later.
on row 20, add a different note without a volume. play from the start, and you'll hear that the new note plays at the volume the previous one left off at. the result of the volume slide is kept in the "memory" of the channel. enter a volume of 7F and play again; it will start at full volume, then ramp down because the 0A volume slide is still going.
how do I make the song longer?
right now, our track is only about six and a half seconds long. this is because we only have one order. see, the term "pattern view" is slightly misleading in that a pattern is just one channel's worth of data; the pattern view shows all the patterns in an order at once. this can get confusing because sometimes both terms are both used to mean what we call an order, sometimes even within Furnace itself.
at the top left of the interface we find the order view. similar to the pattern view, it's like a spreadsheet, but even simpler. from left to right, the top line shows short names for all the channels. each row of numbers beneath that shows which patterns play in that order. for the moment, only the first order 00 appears. click on the + button to the right of the row of channel labels, and another order row appears, not only labeled 01 but filled with that same number. click in the pattern view and move to the top-left by hitting Home twice. you'll see that the new patterns are empty. the pattern view shows the end of the previous pattern but faded out. try moving between these by clicking on their order numbers in the order list.
go to the first order and make sure there are some notes in the first channel. now click on the pattern number to the right of the order number (in the "F1" column); it will increase to 01, and the notes we could see in the pattern view have disappeared! not to worry, they're still stored in the that channel's pattern 00. select order 01 and right-click that first pattern number; it will decrease to 00, and the notes in it will reappear. this way, you can rearrange and reuse parts of your track without having to duplicate them all the time.
go back to the first order and put some notes in the first channel's pattern. in the order view, right-click the button showing two overlaid pages; this is the "duplicate" button. clicking it normally will add a row that repeats the current order. right-clicking that button creates a "deep clone", meaning that all the patterns in it are duplicated to new pattern numbers. when you want to make variations of the same patterns, this is somewhat faster than cut-and-paste (Ctrl-X and Ctrl-V, by the way, with Ctrl-C for copy).
the important take away here is that patterns exist independently of orders. the order list is a playlist of patterns that can be freely rearranged.
how do I change tempo?
tempo and speed are a little tricky – in fact, for the purposes of Furnace, they mean different things! first, let's clear out our first order and put some evenly-spaced notes there.
the most basic unit of time is the tick. almost always, videogame systems take actions based on each frame of video, and these most often happen at 60 times per second, usually expressed as 60Hz. (this is for NTSC systems; systems that expect PAL will use 50Hz, and arcade games can use all sorts of different values...) because of this timing, everything that happens during playback will happen on a tick, never in between ticks.
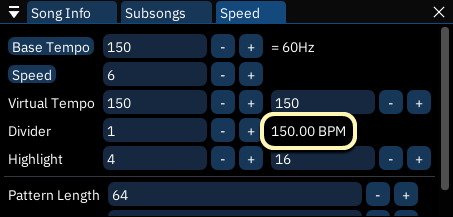
if we click on the "Speed" tab at the top-right of the interface, we'll see the "Base Tempo" line at the top shows the tick rate as "60Hz" to the right. we could change the base tempo to something arbitrary and the tick rate would change accordingly, but this wouldn't be authentic to the system's capabilities, so let's leave the base tempo at 150. we see the calculated tempo three lines down, to the right of the input for "Divider"; it reads "150.00 BPM".
beneath Base Tempo is "Speed", set to 6. right now, each row takes 6 ticks to complete before moving to the next row. let's say we want things to be a little faster. play the current set of notes to hear their tempo first. then, change speed to 5; the tempo after "Divider" will now show "180.00 BPM". play our notes back, and they're definitely faster... perhaps faster than desired. it's possible to get tempos in between by alternating speeds; if you're interested, check out the documentation on speeds and grooves later on.
what about those other channels?
here's where we really get into the nitty-gritty of our emulated videogame system. we've been using Furnace's default system, the Sega Genesis. it employs two very different sound chips. the first is the Yamaha YM2612, also known as the Yamaha OPN2; it uses frequency modulation (FM) synthesis to generate sounds, and that's what we've heard so far. the other sound chip is the Sega PSG; it's a programmable sound generator (PSG) that can only make square waves and variations of noise. it's nowhere near as versatile, but don't ignore it – it's an important part of the classic Genesis sound.
let's start by creating a new instrument, this time choosing "SN76489/Sega PSG" from the list. the new "Instrument 2" appears in the instrument list, already selected. now click in the pattern view and change one of our existing notes to use the new instrument. the number will change color from soft blue to bright yellow; this means that the chosen instrument isn't meant for the chip it's being used on, and if played back, we'll only hear that familiar default FM instrument.
go ahead and undo that edit, then move to the channel labelled "Square 1", the first of the PSG's channels. try adding notes with the new instrument, and they'll work just fine without complaint. of course, they're plain, no-frills square waves. while we're here, try making them quieter by entering new volumes; since this chip only uses sixteen volume levels, 0F is the maximum.
let's move to the noise channel now. the same instrument will work here, but playing different notes gets us different "pitches" of noise. this channel is both more and less versatile than it seems, with several notable quirks that we won't get into here, but take a look at this chip's documentation later on.
what about samples?
the FM side of the Sega Genesis has a special feature; channel 6 can be used to play back digital samples. this means that any recording – a snare drum, an orchestra hit, somebody talking, whatever you have – can be part of the music.
go back to that second instance of Furnace. just as we saved an instrument last time, let's switch to the "Samples" tab and select the lone sample there, "0: example", then save it as a .wav file. swap back to the instance of Furnace we've been working in, and in the Sample tab, open it.
in order to use the sample, we want to make an instrument that references it. right-click on it in the list and select "make instrument". the "Instrument Editor" window will pop up to show us that we now have an instrument 3 named "example", a type of "Generic Sample", and below that, the sample selected is "example". while we're at it, let's change the instrument name to "bell" since that's what it sounds like; just select the "example" at the top and type over it.
now, let's hear it in action. close the instrument editor, then clear out everything in the patterns of our first order. (either delete what's there, or adjust orders to get it out of the way. try hitting Ctrl-A three times to select everything at once.) switch to our new bell instrument and put a C-4 note in channel "FM 6". when we play it back, it sounds perfect!
if ever a sample sounds out of tune, refer to the sample tuning guide to fix it up.
an important note: in this case, we can use a Generic Sample instrument type just fine, but there are chips that use samples in specialized ways. always check the chip's documentation for the best way to use samples with it.
now that we've gotten everything we need from quickstart.fur, close that instance of Furnace.
what about wavetables?
some chips can use wavetables, which are a lot like very short looping samples. one of these is the Game Boy. let's start a new file, either from the menu or with Ctrl-N. a warning dialog asks if you want to save; it's up to you. after that, a dialog box pops up to ask which system we want; type "boy" in the search and it will be at the top of the results. select it.
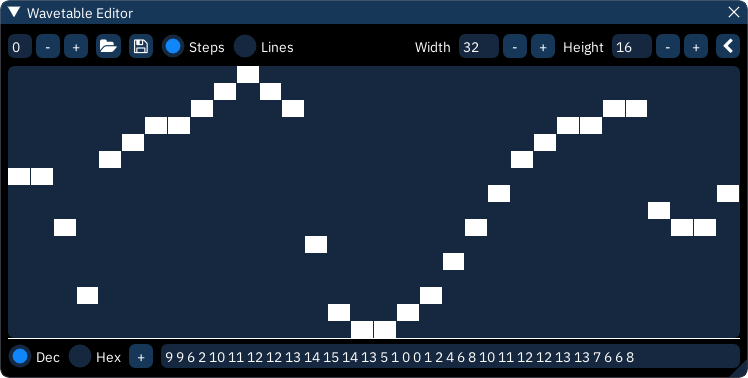
in our brand new song, we'll want to add a new wavetable. between the "Instruments" and "Samples" tabs, select "Wavetables". add a new one with the + button. Furnace will generate a wavetable of the right size for the current chip, and it will already have a sawtooth wave in it.
double-click that new entry to open the "Wavetable Editor". you'll see a line of large pixel-like blocks. this is our sawtooth wave. nice as those are, let's get creative. click anywhere in that area and "draw" a new wave, something interesting. note that at the bottom of the window, there's a line of numbers that change as you edit. you can edit the numbers directly to change the values above; keep this in mind for later. once you're happy with this wavetable, make at least two more, just for later demonstration purposes.
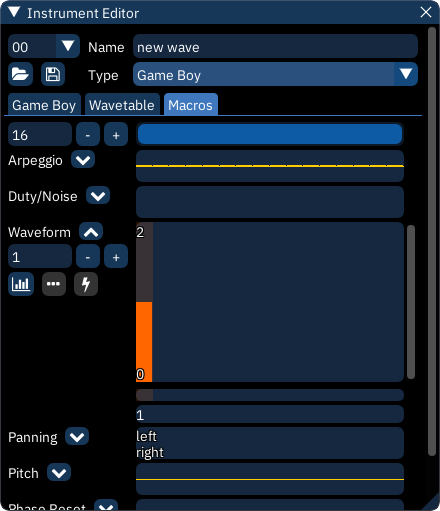
right now, we can't do much with this wavetable; as with samples, it needs an instrument. this time we can't just create one directly from the wavetable, so go to the instruments list and add a new one. open it up in the instrument editor, name it whatever you like, then select its "Macros" tab.
we'll get to macros in more detail in a bit, but for now, simply click the down-arrow next to "Waveform". click the + button that appears; a column will turn grey in the box to the right. click in the middle of that column and it turns half orange; this is how you select which wavetable to use for this instrument. it's like a bar graph.
close the wavetable editor, move the instrument editor off to the side, and click into the "Wavetable" channel in the pattern view. add a few notes to get a good sense of their tone. in the instrument editor, change that macro to a different value, and play the notes again to hear the difference between the wavetables you made.
but... what's a macro?
the macro is perhaps Furnace's most powerful feature. formally defined, it automates a note's parameters while it plays. a lot of what can be achieved with effects can be done with macros, but on a per-tick basis instead of per-row.
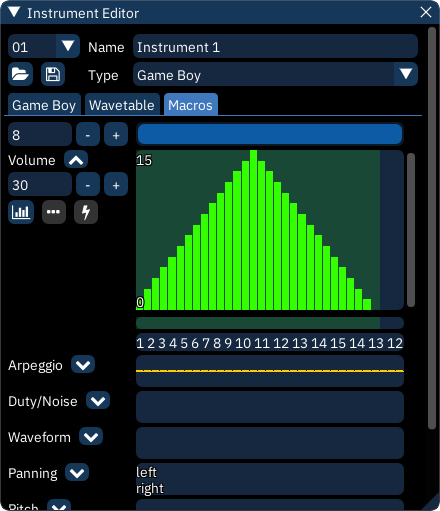
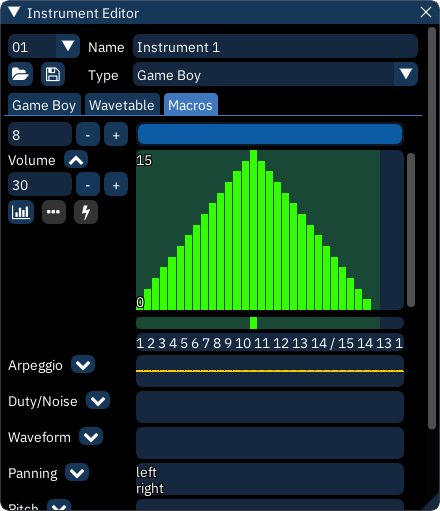
let's start by clearing out the notes we've entered. after that, move the cursor to the top-left into the "Pulse 1" channel. create a new instrument and go into the instrument editor. we'll want to work with the volume macro, but before we can do that, we have to select the "Game Boy" tab and check the box labelled "Use software envelope". the Game Boy's sound hardware can do its own limited volume envelopes, but those won't help us right now, and if we leave the box unchecked, the volume macro won't work (though the others will).
in the "Macros" tab, the number input field that appears beneath the word "Volume" is the length of the volume macro; let's set it to 30. in the large box next to it, draw a ramp from near minimum volume (1) to maximum volume (15) at the left, then another down to minimum volume (0) at the right. if it's a little uneven, that's okay; you can always edit the numbers directly beneath the box, just as with the wavetable editor. also try right-clicking in the macro and dragging; now you have perfectly smooth ramps.
you may have a little trouble navigating the whole macro at once. use the scrollbar at the top of the macros tab to move around it. even better, use the - button to the left of it to narrow the bars until it's all visible!
while in the instrument editor (and as long as you're not in a text box) you can play notes on the keyboard without affecting anything in the pattern view. give it a try, and you'll notice that when held down, each note does its own quick fade in then fade to silence. you could do this with effects, but if you're using it on many notes, doing it with the instrument itself could save a lot of typing!
in the pattern view, add a few notes spaced far enough apart that the whole rise and fall is audible (at speed 6, five rows will do). then look to the thin bar underneath the macro view. it may not look like much, but if you hold the Shift key and click directly underneath the peak of the macro, it will light up green. we've just set a release point. play with the instrument a little here, and notice that holding the key down holds the note in place at top volume – at the release point – until let go. now play the song from the start; each note will rise to max volume then stay there until the next note plays.
about ten rows after the last note in our song, place a note off. the final note rises to maximum, then is suddenly cut off! to get the rest of the macro to play, move your cursor over the note off and use the ~ key to replace it with a macro release instead, which will appear as REL. now when the song is played back, the final note will rise and hold steady until it reaches the macro release, then we'll hear the rest of the macro play out.
macros are absurdly powerful tools. read the macro documentation to make the most of them!
what's next?
now you know the basics of how to make music with Furnace. from here, the rest of the documentation should make more sense, and it should be your primary reference. if you have questions that aren't answered there, feel free to ask in the Discussions section on Furnace's GitHub repository.
most of all, don't be afraid to experiment. go play!
